Quick Start
An eight-step guide to launching Smart Annotation, configuring a template, and running Tag and Arrange.
To quickly get started with Smart Annotation:
- Open your Revit project.
- Click on the Smart Annotation icon in the Add-Ins tab.
- Open a view to annotate.
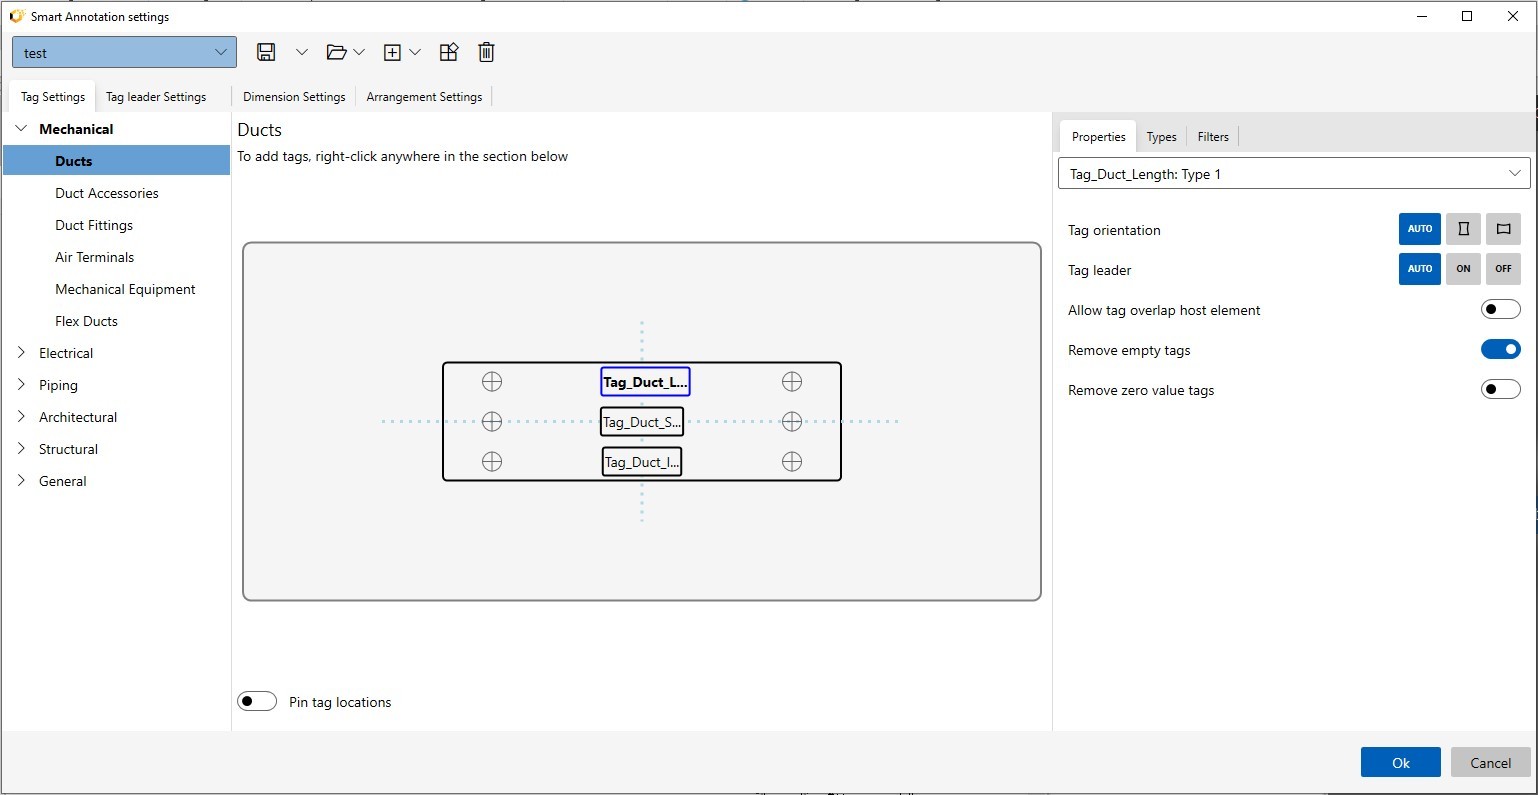
- Open the Settings panel by clicking the Settings button in the Smart Annotation ribbon.
- Create a new template or choose an existing one.
- To create a new template, click New Setting in the Settings panel and configure categories, tag families, and placement rules.
- Apply your template. Once your settings are ready, select a pre-configured template or the one you just created.
- Use the Tag and Arrange tool to automatically place and organize tags on the selected elements in your view.

For detailed instructions, refer to the subsequent sections.
Related Resources
- Previous: Smart Annotation Intro
- Next: Create, Manage Templates