

Dimension and Arrange
Automatically place and arrange dimensions in plans, elevations, or detail views:

Click Dimension and Arrange from the Smart Annotation ribbon.
Choose the appropriate tag setting template that includes dimension settings.
Select the model elements to annotate.
Choose one of two dimensioning modes:
New annotations only.
Both new and existing tags.
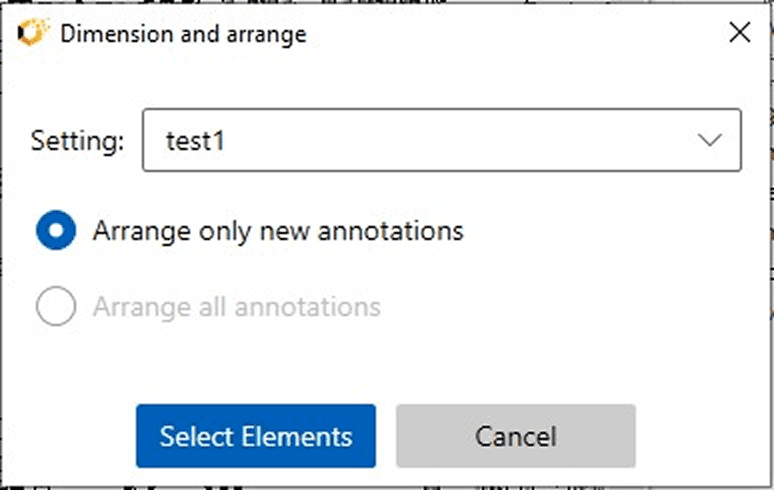
Click Finish. Smart Annotation places and arranges dimensions per the predefined rules.
Key Benefits:
Consistent Layout: Uniform alignment and spacing of dimension lines.
Context-Aware Placement: Dimensions snap to walls, grids, centerlines, or other references.
Reduced Rework: Prevents overlapping and unnecessary dimensioning.
Behind the Scenes:
The logic is defined in the Dimension Settings tab, where you specify:
Element categories to dimension (e.g., ducts, pipes, walls).
References to use (e.g., grids, levels, centerlines).
Whether to enable Chain Dimensions.
Dimension style settings.
If these settings are not yet configured, return to the Settings panel to define them before using this tool. This ensures accurate, legible drawings with minimal effort.
By leveraging Smart Annotation, users can automate and standardize their Revit annotation workflows, saving time and ensuring consistency across projects.
